Happy Tuesday, friends! I hope your week is off to a great start, and if your kids have gone back to school, that you’re finding a new rhythm! I know I’m feeling a lot more productive with them gone. Hopefully that leads to more unpacking and re-decorating soon, ha!
As you know, we had to move out of our house this Summer to repair the damage caused by the Texas Winter Storm (considering the expense, I think the storm warrants caps!). I shared our new floors HERE, and had so much fun seeing the progression of our house, I’m back today with more Before & Afters!
Like most home projects, this one snowballed once we got started! But once the house was cleared of furniture and was in total demolition anyway, we decided to tackle the remaining updates we’ve wanted to do. After all, it couldn’t get any messier!
Mantel //
First up… the mantel has always been a little ‘extra’ for my taste, so we pulled down the layers of trim and molding and replaced with a simpler design. We’ll start with the Before shot of when we moved in…

We initially streamlined the built-ins, retiled around the firebox, and swapped the carpet to hardwoods, and it was a nice update… but was still A LOT of molding.

So this time we pulled the rest of the molding for cleaner lines and less visual weight in the room. Shocking transformation, right?!
It’s just a simple box of wood, framed with basic white quartz. We’ll update the firebox with new logs and stones before Winter, but the transformation is exactly what I wanted.

Paint: SW ‘Pure White’ on walls & trim


Paint: SW ‘Pure White’ on walls & trim | Floors: Monaco White Oak
Enclosed Foyer //
I’ve always wanted to optimize square footage and enclose the awkward opening above the foyer that looked in to the upstairs, but assumed it was a huge undertaking.
But in just a few short hours, they had beams installed and drywall on the ceiling! We used leftover Monaco White Oak for the flooring, and BAM… instant mini room! I think it will be perfect for an exercise spot.


The ceilings are 10-feet, so plenty high to keep it from feeling closed in! We opted for can lights on dimmers rather than a fixture since the lights in the adjoining Living and Dining Rooms are such statement makers. (See those HERE.)

Navy Paint: Farrow & Ball ‘Hague Blue’ | White Paint: SW ‘Pure White’ | Lighter Blue: SW ‘Aqua Sphere’ | Floors: Monaco White Oak


Walls: SW ‘Repose Gray’ | Trim: SW ‘Pure White’ | Floors: Monaco White Oak
Paint & Baseboards //
It was hard to notice in photos, but drove me nuts in person… but the trim and doors throughout the house weren’t quite white. They weren’t a pretty creamy white either, but rather a yellowed, aged white. They’d also seen better days since it’s been who-knows-how-long since they’ve been painted. (The house is almost 30 years old.)
It’s a project I’ve wanted to tackle since moving in, but always put it off since it required oil-based paint… and that is stinky! But since they had to pull all the baseboards to replace the floors (and we weren’t living there!), we used it as the chance to refresh throughout with a coat of SW ‘Pure White.’

We also chose a taller, simpler baseboard and installed it throughout the downstairs. (We used to have three different styles and sizes!)

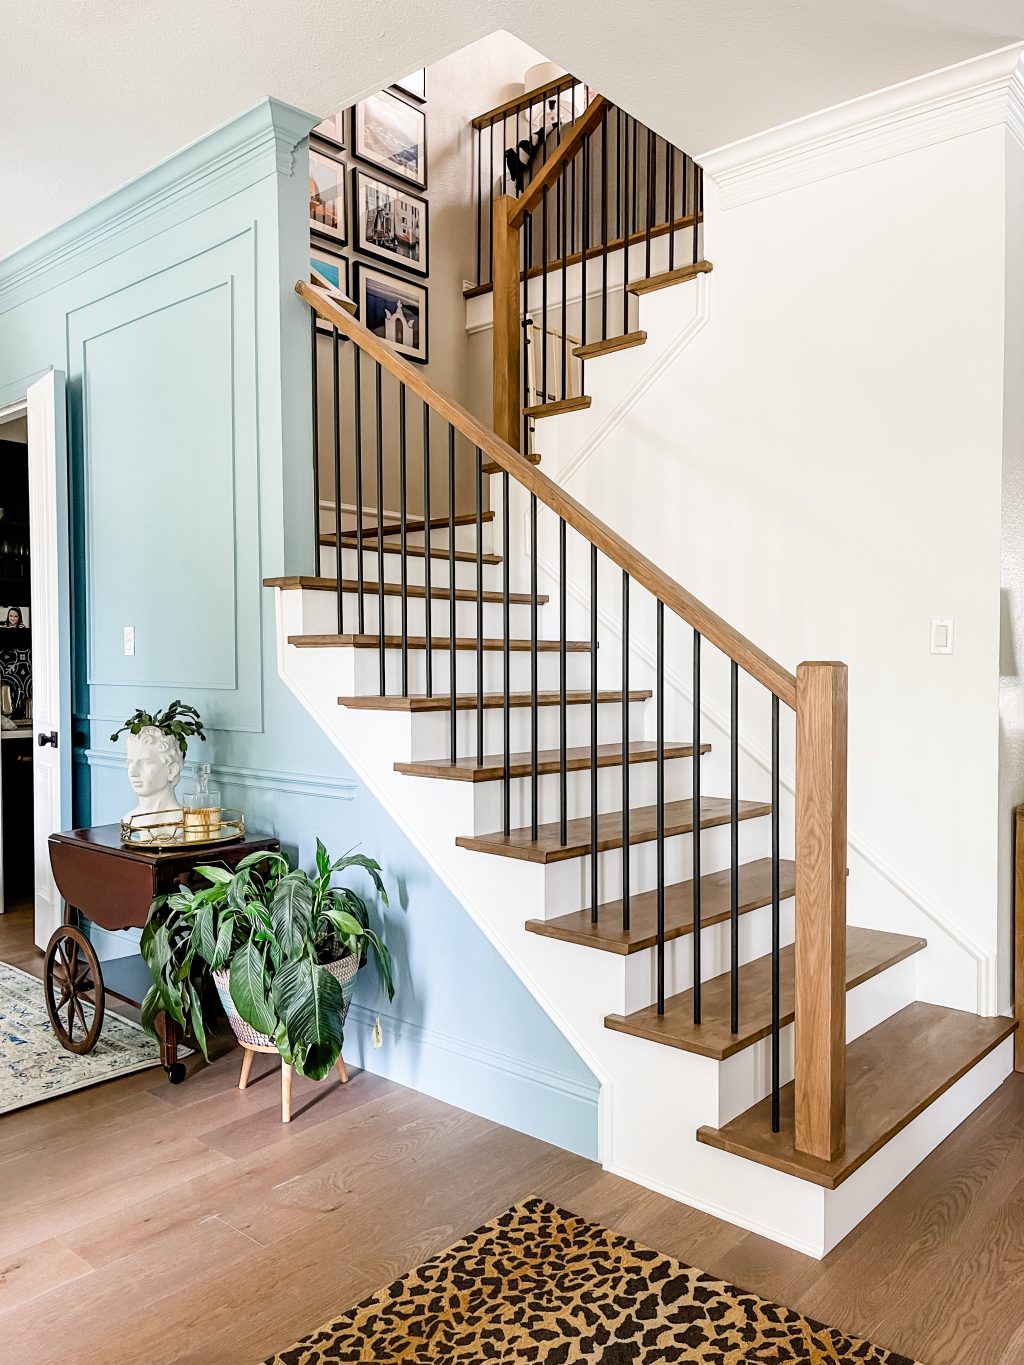
Stairs //
This project came at the very end and wasn’t even on my radar… after all, we’d given the stairs a mini-makeover when we moved in!


But upon further inspection, we discovered unstable rails, broken spindles, and split treads. Not to mention, the base of the railings was MDF and had swelled with water damage over the years.
So new stairs it was! And OH MY WOW do they change everything!

Dining Room Walls: SW ‘Aqua Sphere’ | Everything Else: SW ‘Pure White’ | Floors: Monaco White Oak | Railing & Treads: Stained to match floors | Spindles: Square Black Matte Iron


Photos are from our travels in IKEA frames | Adjoining Bonus Room HERE


Adjoining Family Room HERE
I mean… just look at the difference with the new stairs and without the opening!


Another update we did throughout the house was replace the old, tarnished door knobs with matte black. It was an instant update and made a HUGE difference! (I ordered these.)
We also swapped all the yellowing outlets and switches with bright white. These small changes did wonders in giving the entire house a fresh, clean feel, while still staying true to her traditional bones.

Dining Room Walls: SW ‘Aqua Sphere’ | Doorknobs
I can honestly say we likely would have never tackled these projects had the house not flooded, so there’s the silver lining, right?! It’s not something I’d like to do again, but our contractor certainly made the process easier. His crews worked fast and efficiently, while being considerate of our home! I’d highly recommend him if you’re in the Dallas area… find him HERE.
You can watch the full transformation HERE, and see all the Before & Afters of the flooring in each room HERE.
Up next, unpacking all the boxes and putting things back on the wall! Surely that will happen by Christmas, right?!
[More Home Decor Posts]
Our New Floors!
Kitchen Remodel
Backyard Pool & Patio Remodel
Primary Bathroom Remodel