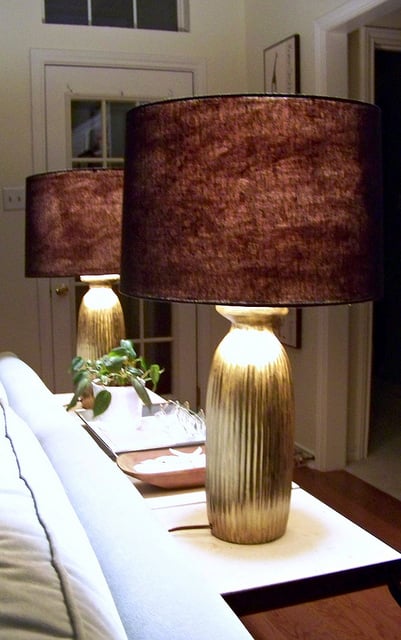
Hello m’dears! How was your weekend, besides too short?! Ours was jam-packed with all the best stuff….night out with friends, paint, Halloween decor and Mexican food! Try as I did, I wasn’t able to stump you guys with my project plan for the weekend. You clever cookies spotted the gorgeous gold-lined lampshades with no problems.
So how’d they turn out? See for yourself!
Love, Love, Love! And it was a really simple makeover, so love it more! I thought about lining them with gold paper like Jenny, but decided to try the Metallic Masters I used for the side table (that way the golds would be cohesive, as well). Since my lampshade has a liner, I was able to paint directly on it. Some shades have paper liners, mine is a polyester of sorts, which worked out fine.
See how much is going on…gold finial, silver frame, white liner? Looks like it was patched together. Oh wait, it was! But certainly not the look I’m going for.
Using a small craft brush, I painted around the lip, careful not to get much paint on the black fabric.
And did the same along the seam.
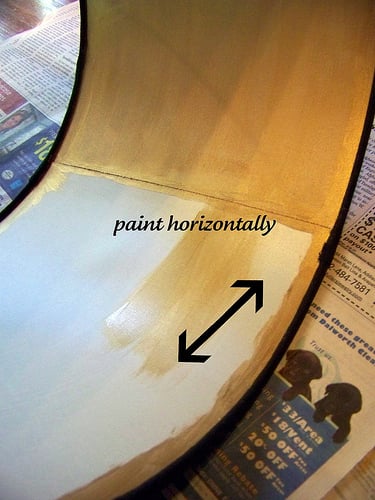
Then I switched to a foam brush (to avoid brush strokes showing through when the lamp is on), and painted the entire shade, keeping the lines horizontal.
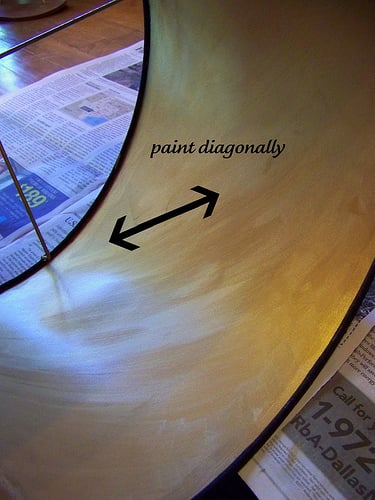
For a more even coverage and smooth finish, I painted the second coat diagonally. You want to keep the saturation of paint consistent all the way around, or some spots will be darker when the light is on.
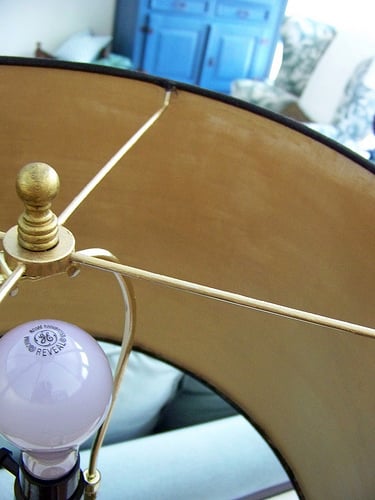
The last step was to Rub ‘n Buff (yep, using it as a verb now, it’s that good) the finial and frame.
Now all the parts are a happy, gold family!
Pretty big difference, no? I love how the gold really pops off the black shade.
It certainly kicks them up a notch, and adds more glamour to the room, dahling!
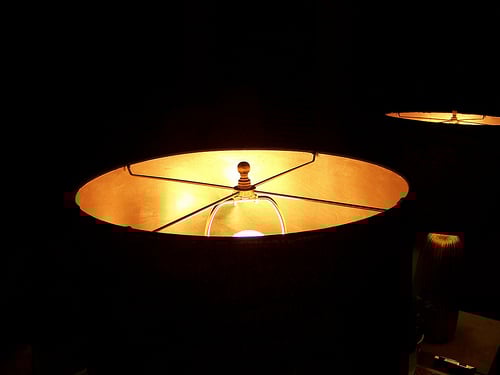
Hold on to your hats for the money shot….this shows the true glow they give off at night.
I blew this picture out so could see what I mean about getting consistent coverage with your paint, and why I changed directions of the brush strokes between layers. But it’s not noticeable in person.
And since I had the paint out, I did a quick layer over the coppery finish of the lamp base.
They looked a little tarnished to me before, but now they have the right about of brightness.
And one more because I just can’t get enough.
It doesn’t look like a $30 Home Goods lamp any more, does it? I’d better be careful with the gold though, it’s close to looking like Liberace lives up in here!


