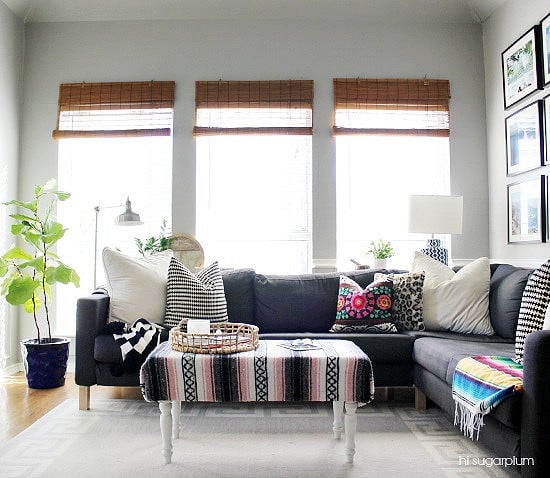
It was long and narrow, with doors and walk-throughs on every wall, and in odd locations. We rearranged that room 87 times over the years, and of course it was in our final year in the house that we solved the puzzle. (You can read about the process here, and see the floor plan that worked here.) The best thing we did was add a sectional…the only downside was the dark corner it created in the middle. We could put lamps on either end, but the center was a black hole. #TWSS
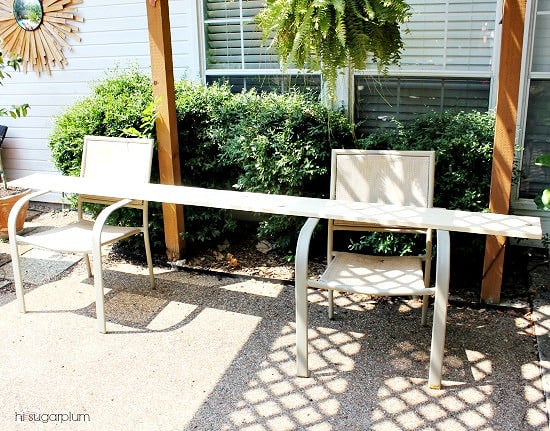
We looked for console tables to place behind it to house a lamp, but the sofa is 110-inches long…there aren’t a lot of options at that size, that are affordable anyway. We also didn’t have much room to scooch the sofa forward…so not only did we need a long table, but it had to be narrow. #hellocraigslist?
Once I realized only the top and one side of the table would be seen, I knew we could DIY something that would solve our problem, and provide more function for the room. And of course it’s super simple and el cheapo, because that’s who how I am.

We started with our table top (we used pine), cut to 110-inches (Home Depot will cut it free, Lowes will if you bat your eyes). I wanted something thicker, but we were concerned about the weight…and really it didn’t matter since it’s mostly the top that’s seen.


Tip: Stain both sides of your table and side pieces. Since our table ended up taller than the sofa, you could see the underside of it. The raw, unstained side. #oops

Hold a side piece flush to the brackets and attach.

Do the same to the other side. You see how easy this is?! All you need is a screwdriver. #makemineadouble


Ours bowed a little in the middle because of the extra-long length, so we reinforced it with a bracket screwed to the wall, and attached to the table. I wouldn’t place cinder blocks on it, but it held strong for lamps, remotes, and mama’s special juice.

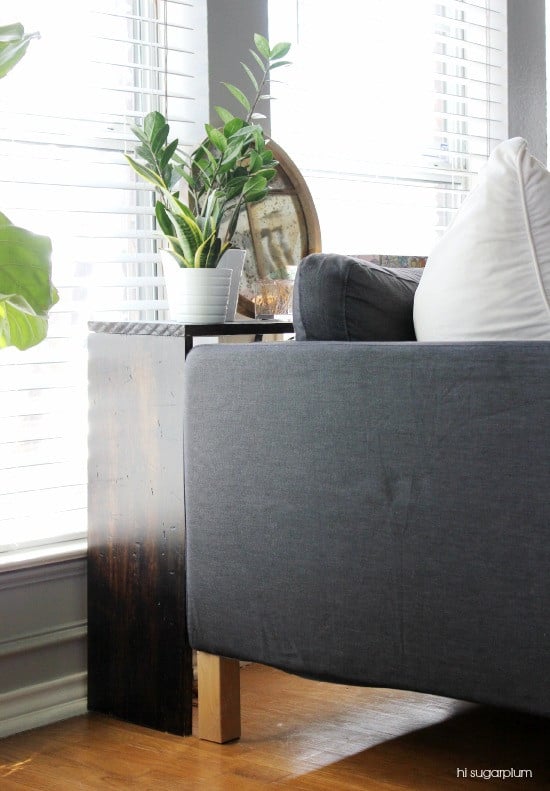


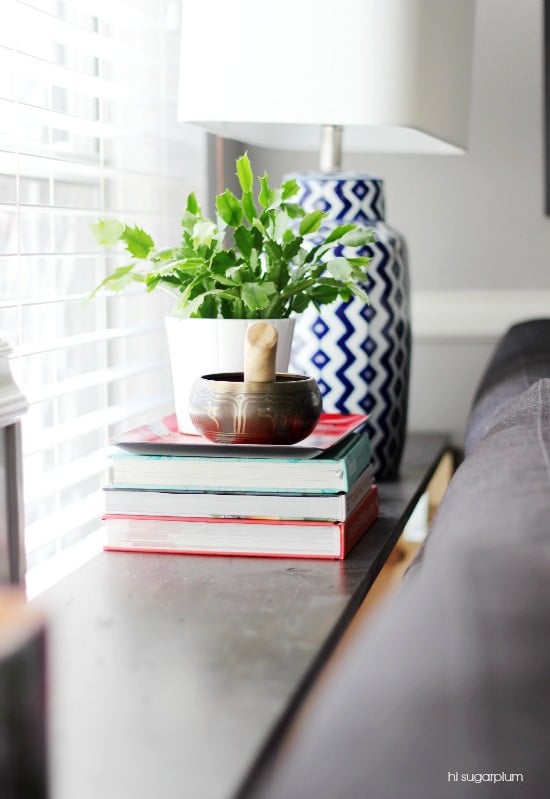
I lucked out finding this lamp with a rectangular shade at Home Goods…traditional round shades grazed the window, and the back of the person’s head who snagged the coveted corner seat.


Do you have an area that could benefit from a console table? This little ditty was only around $50…you can’t beat that with a stick! You’re impressed, right?! We were certainly doing a lot of back-patting.
Additional DIY projects seen throughout the room:
Gold-Dot Vase
Organized DVDs in a Single Basket
Blue Squiggle Vases
How to Hide Lamp Cords
Embroidered Fedora Hat
Pom Pom Throw
{Source List}
Photo Wall Frames // Ikea Ribba
Sectional Sofa // Ikea
Black & White Houndstooth Pillows // Ikea
Suzani Pillows // One Kings Lane
Leopard Pillow // H&M Home
Round Tray Basket // Home Goods
Blue & White Lamp // Home Goods
Art behind sofa // Teil Duncan at Furbish
Plaid Blanket Scarf used as a Throw // Nordstrom
Gold Urchin // Furbish
Shallow Storage Basket // World Market
Desk Lamp // Ikea
Turquoise Desk Chair // World Market
Lady Bust // Home Goods
Leather Pouf // Lulu & Georgia
Rugby Striped Bin // Container Store
Golden Gate Bridge Dish // Anthropologie
Wall Antlers // Target
Chevron Drapes in Breakfast Room // West Elm
Maggie’s Bed // LL Bean (it’s monogramed! #duh)
Greek Key Rug // Rugs USA
Wall Color // Behr ‘Ashes’ in Satin finish
Great idea for the table! And I feel ya on the missing items. My 2 favorite swimsuits are playing hide-and-seek and I have NO IDEA where they are! Boo!
It's perfect. Love how long it is and the dark wood
that is awesome! and no ur not alone – I luv when my remotes are tucked away. I DIY'd a remote box just for that, haha. and we all need somewhere to set our mama juice
so fabulous! love the easy build projects that look great and function well!
Great idea and looks so simple!
You are little genius! I was hoping you'd share the details of the console table. Mama's juice..hee hee!!
Such a simple project with a huge effect! Thanks so much for sharing the details!
Such a smart solution Cassie xo
You're my kind of girl–if you can't find it, make it! It turned out perfectly for the room.
This looks so great Cassie!!
love it!
This table is great and I love how you have all of the remotes stowed away in a cute photo box!
Great job! You crack me up with Momma's special juice!!!
Look at you all building stuff! Nicely done – I love a console table behind the sofa – such a classic look. And I'm dying over that blue HG lamp! Love it!!
I did not realize you owned this sofa! This is the sofa I have been thinking of purchasing. I first saw it on YHL. You can get it so that instead of being an L shaped sectional, it has a chaise on each end. I think that would work for our family, and for our living room. How do you like yours. Is it wearing OK?
Hi Nicki — yes…we've had the sofa a few years now, and love it! It's pretty firm in the beginning, but softens up over time. The cushions have all held their shape nicely, too. You can't beat it for the price and size!
Love, love, love, love, LOVE this! Including the box for the remotes. The minute we no longer have reclining sofas, that console is making an appearance in OneandSeventy's living room. The box may appear much sooner 😉 Thanks for sharing, Cassie. This is a DIY I think even I could do! Sue J – The World of Suzy Homemaker