It’s Friday, I’m loopy, I’m freshly blonde again (thanks babe!) — so I’ll try to make it through this post without you wanting to stick a fork in your eye. (Please don’t, that would really ruin your weekend!)
Yesterday I showed you the ‘Big Picture’ changes. Today I’m going to show you the little details in the new kitchen that make me giddy.
First up, let’s look again at the eyesore that once housed the trash compactor:

I think it gets worse looking every time! And no, we didn’t live with it like that for 5 years! I rigged up hung a small tension rod with a fabric curtain. I hated it. So my amazing contractor built a new cabinet face and it looks like this:
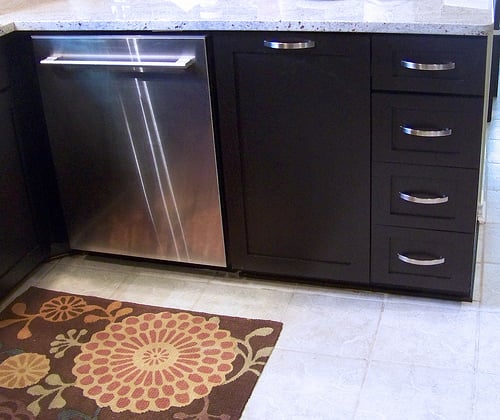
But hiding behind all that sleekness:

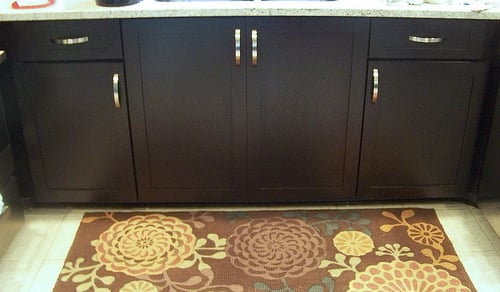
A pull-out trash! And it’s huge! And the cool part is I can just sweep crumbs right off the counter and into the trash. Notice too that the cabinet to the right of it has been converted to drawers. You’d never think it, but drawers hold so much more stuff than a cabinet. Remember this wall:

He built drawers there too…just look how deep! Every counter top appliance, Pyrex, mixing bowl, cutting board, etc that I own fits in these!

A pull-out tray was installed for my cleaning supplies so I don’t have to crawl under the disposal to get to them.

And see the two cut-outs above the cabinet opening? Those were the ‘dummy’ drawers. Well, Fred Sanford doesn’t live in my house, so I had the cabinet doors built taller to cover them. I think it looks so much more streamlined…and truthfully, it’s one of my favorite parts of the kitchen! (Thanks for the genius tip AC!)
Ideally, I wanted to build a second row of glass front cabinets to go on top of the existing ones…reaching to the ceiling. But my budget forced me to get creative. The original cabinets are 30″ tall, and looked so squat and sumo-wrestler like.

I got kind of an ‘eyebrow raise’ from my contractor (I’ve been getting those for years, I’m not offended by it. I’m a Scorpio…I know what I want dammit!!) when I suggested he added a piece of wood, and then an extra tall crown molding…both stained to match the cabinets. It literally took him two seconds to nailgun it down.
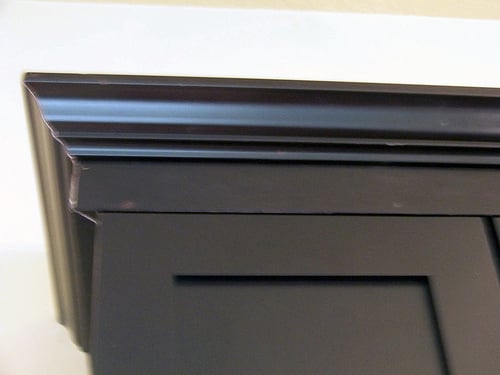
Now the cabinets are 37″ tall! It didn’t add any extra storage…but it added drama by drawing the eye up more. I also think it makes the cabinets look so much more substantial, and furniture-like.

I didn’t want the room too serious, so we gave the room a little quirk-factor by adding a fun Ikea light over the sink

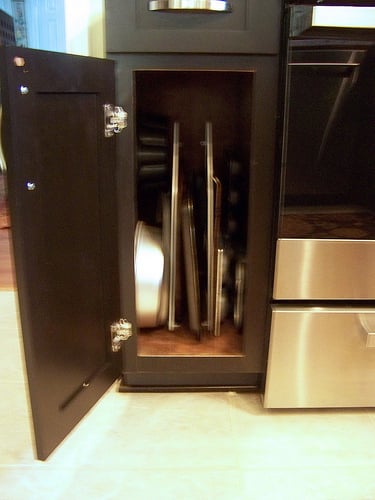
More efficient storage with a tray divider
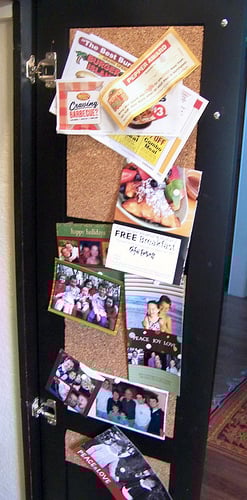
Keep the clutter hidden by putting a few cork panels on the inside of pantry doors
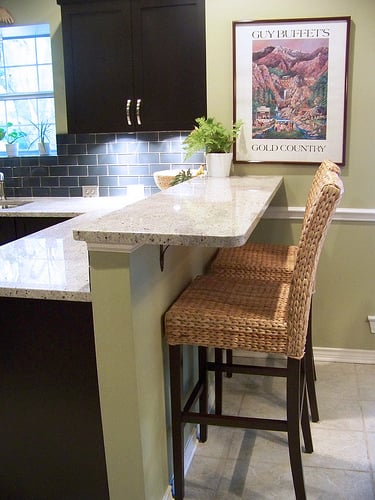
And created a breakfast bar by simply placing a piece of granite on top, anchored by a couple of iron brackets.
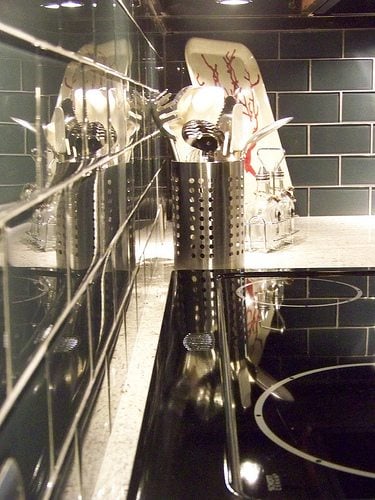
One of the more genius ideas my contractor had was to drop the switch plates and outlets down flush with the counters, and turn them horizontally

It keeps you from having a big ol’ plate in the middle of your beautiful back splash!
I got silver plate covers to blend in better…and he cleverly painted the actual plug part with silver car paint. Those details make a huge difference.
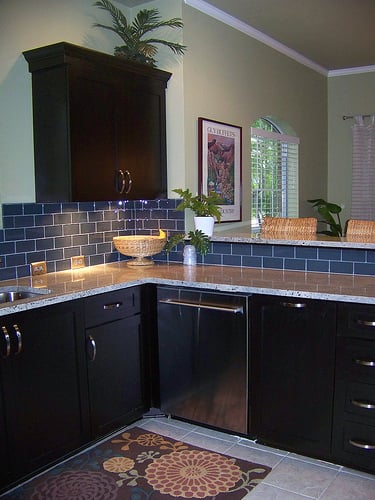
After having white Formica, I’m beside myself to have granite. They extended the counters 1.5″ beyond the edge of the cabinets….you wouldn’t think such a small adjustment matters…but it really feels like I have more room to work. The under-cabinet puck lights are a nice addition too.

But the showstopper is the glass tile back splash. It’s the first thing people comment on, before they go over and stroke it. It is so reflective and the color changes with the light. It can be very expensive (most start at $30/sq. ft), but I scoured discount tile stores relentlessly, begged asked for discounts, and then had my contractor go pick it up using his additional discount. My motto for most everything is “It can’t hurt to ask!” It paid off, I got this beautiful gray/blue tile for $9/sq. ft!!
Are you still awake!!!??? My advice to you if you are about to start a reno (any room really!), is to look at as many pictures as you can! Use them as your guinea pig to see what you like. I consulted pictures for everything down to where I wanted my hardware positioned (that’s what she said)! Also, pick someones brain who has been through a similar reno and benefit from their experience and “coulda woulda shoulda’s.” And I proved it can’t hurt to go directly to the source…by asking for additional discounts, or even emailing the designer of a room directly for advice! You never know!!
What are the favorite little details of a room you’ve redone? Have you scored additional discounts or had a similar experience with a designer? Do tell!

So hard to believe that ho-hum builder's kitchen turned into the sleek, beautiful one worthy of ANY magazine….it eclipses most renovations I've seen in ages!
I'm beyond jealous!
The kitchen looks beautiful! Just a quick question – where did you get those gorgeous bar stools/chairs? I'm looking for some and those would be perfect!
Hi Erika! Thanks for the comment! I got the stools at World Market (Cost Plus in some states). They make them in bar, counter and dining height. I waited for them to go on sale, then used my 10% off (sign up for their free reward program for it!). They are great…and the seat is not scratchy like you'd think. Good luck!
where did you get that beautiful rug?
Rlandau1@bezeqint.net
Amen, sister! I'm a Scorpio, too, and I know what I want! I get those eyebrow raises alllllll the time. But I'm almost always right. 😉
Just found your blog and I'm having so much fun reading it! Wondering how you like your appliances? Are they all from IKEA did you say?
lindspete@hotmail.com
Hi! New reader, just came across these pictures of your beautiful kitchen renovation and had to comment because we are in the throes of our own full kitchen gut and remodel. Cabinets are in and countertops soon, woo hoo! We are doing IKEA Adel Medium Brown cabinets, white Zodiaq countertops and are also doing a blue-gray glass subway tile backsplash. My question is, on the edge of your glass backsplash where it goes beyond your cabinets or at the end of the run (by the stove), did you put an edge or trim on it, or just leave it as the plain glass tile edge? I'm leaning towards just the edge but DH keeps voicing concerns about that looking funny. Thanks!
Mindy here again 🙂 You just replied to me about your step stool, thanks for being so quick!
I'm interested in doing a backsplash too (loving subway style, but don't have a white kitchen –> <3 yours!) and would love to hear more (what sites you looked at, what price ranges you came across, etc)
You said you just refaced the cabinets? So did you paint them black or stain them?
(New reader, by the way, I came here from Young House Love.)
Just going through some of your archives and came across this post- beautiful kitchen! And, did you strike contractor gold or what?? Sounds like they really worked with you to make you happy!
Is there a website you used to order your refacing materials? I'm really interested in knowing where they came from!!! Thanks your kitchen looks amazing btw!
Can you expand on the "refacing" of the cabinets? Cost, color, style, etc? I love them! I have the same before cabinets…love the new finish! Thanks! 🙂
Hi everyone…thanks for the comments!
Regarding cabinet refacing: The contractor replaced our doors (giving them hidden hinges for a cleaner look), and simply applied a peel-n-stick wood veneer to the bases of the cabinets. So the only 'new' is the door….huge savings!
We also had moldings added to the tops to make them appear larger and more custom.
Hope this helps!
Hi there!
What is the paint color you used in the kitchen? and the dining area?
LOVE IT!
I too would love to know what your paint colour is! It looks great with the dark cabinets. Thanks!
Thanks for the kind words, everyone! Most of you don't have email accts tied to your IDs, so I'll answer the questions here.
Rivka — the rug in these pics is from World Market. The rug in the newer Kitchen pics is Urban Outfitters.
Lindsey — ALL the appliances are Whirlpool for Ikea and we LOVE them! The only problems we've had have been our doing, and the warranty has covered it all. FIVE year warranty…best you'll find anywhere!
Stacey — we don't have any kind of edge or trim along the glass tile that extends to the cabinets. I wondered about it, too, but it doesn't look odd at all.
Lil Mama — I found the glass tile at a local shop and my contractor got me an extra discount. I found similar tile for @ $11/sq ft on amazon!
Ariana — our cabinets got new doors, and the sides and bases were covered with a 'peel and stick' wood veneer to match.
Jessica — our contractor did all the refacing, so I don't have any sources to share. So sorry!
Wendy & Melanie — the wall color is an old Martha Stewart for Sherwin Williams, called Fen. They still have all the formulas, so they'll still mix it up (and probably have swatch book of it behind the counter). It's a good green…with brown and gray undertones.
Hope this helps guys!!
I hopped over her from your guest blog at Iheartorganizing and love your kitchen. I am especially interested in the pull out drawer that you put in under the sink – I have the same problem with the disposal and pipes. Where did you get it and did you install it? Thanks for any help.
Paigeshannon — our contractor installed the drawer during the reno process….but it's basically a flat wood with four sides, and mounted on two pull-out rails. You could duplicate it fairly easily. I know Target and Container Store sell pullouts that you install on rails, too. Hope this helps!
LOVE this kitchen! It's very similar to the colors we are doing in our new house! 🙂 One question – where did you get the undercounter lighting??
Hi Anon! The under-counter lights were installed by my contractor…but I know they sell similar puck lights at Ikea and Home Depot!
I have a question about your refrigerator. You said it was Whirlpool. Most stainless steel appliances have gray on the side. Yours is black. I will need black, too! Did you paint it black?
It's Whirlpool for Ikea…all my appliances are from Ikea. The fridge came with a black side!