If you’ve been reading this blog for awhile, you know I A) don’t sew; B) am no stranger to iron-on fusion tape; and C) don’t wash my hair too frequently. C has nothing to do with this post, but you have to have an A, B and C when making a point.
Throw pillows are to a room what earrings are to an outfit…necessary and the perfect accessory. Babygirl’s Bed and Art Center were crying out for pillows, and I wasn’t about to let my inability to sew get in the way!

I really stumbled through this project, and the outcome isn’t perfect, by any means. But I’ll explain the process as best I can, and hopefully you’ll learn from my mistakes. And mistake Numero 1 was thinking that even though I’d never made pillows, I could make them with piping?!!? I do love the look, but it just made this basic project a pain-in-the-ass more intricate.
I’ll let the pictures tell the story, and insert my tidbits as we go (TWSS). The ‘Steam-A-Seam’ is great because it has a tacky surface that temporarily adheres to the fabric before you iron it permanently in place. So you don’t have to worry about the hem tape moving around while aligning fabric and applying the iron.

It’s not necessary to buy pre-packaged pillow forms ($$). I found this lumbar in the clearance aisle for $3. The backside has some pretty attractive stars and stripes, but as long as your fabric hides the design, it doesn’t matter.
Just like with sewing (or so I’ve been told), you make the pillows inside out.
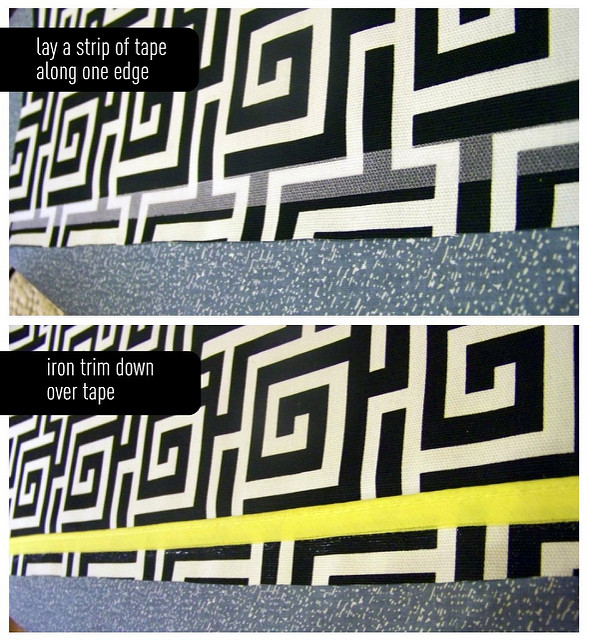
This step was so much easier with the double-stick since I was able to position the trim perfectly straight before ironing it down. Just be sure the ‘tube’ of the piping lays outside of the fusion tape (you don’t want it ironed down or flattened).
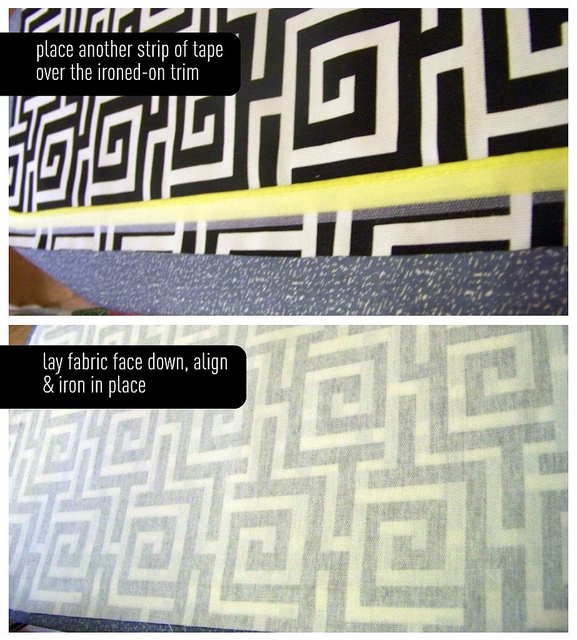
Repeat this step on 3 sides and allow the fabric and tape plenty of time to cool and set. Then carefully turn right-side out and insert the pillow form.
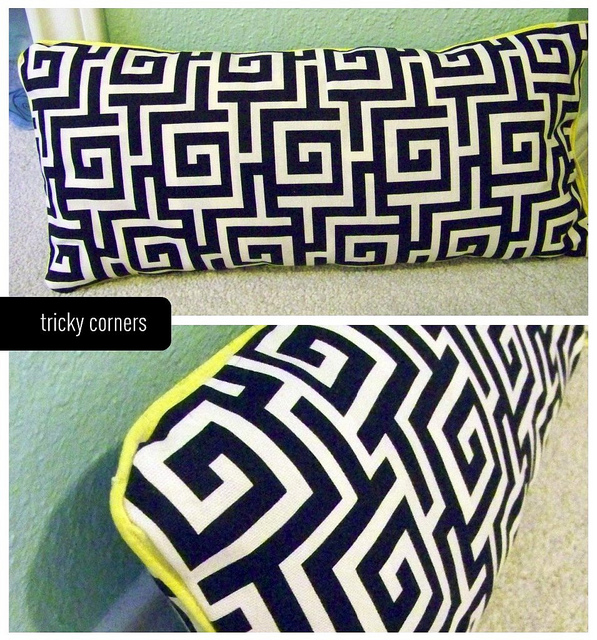
Yeah, so turns out the piping is quite tricky on the corners! Here I tried again on some smaller square forms (toss pillows found at Ikea for $2 each). I also decided to mix up the fabrics.

Here’s my mistake regarding the piping and corners. If you simply meet the two points, once you turn the pillow right-side-out, the corner piping will poke out with two exposed ends.

I found 2 ways that work….you either keep the piping a single piece for the entire circumference of the pillow (which requires you to round it at the corners, and tricky to do with a large iron); or you overlap the pieces of piping in an X pattern at each corner. I went with the second option (but of course didn’t get a pic of it…I was too annoyed to remember my camera at this point.)
Same steps apply as the other pillow:
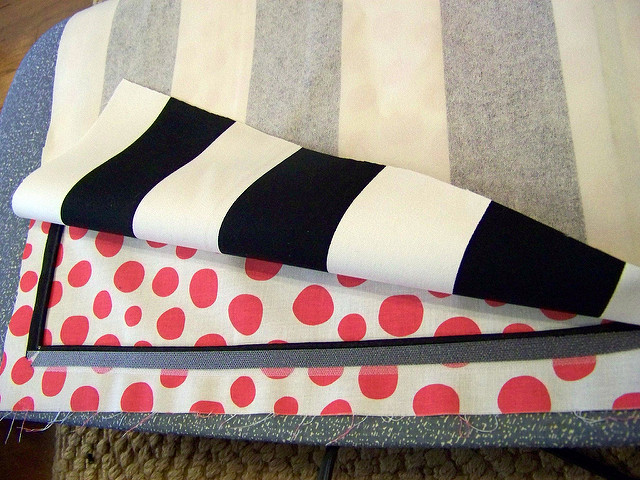
Once you turn the pillows right-side out, you have to contend with the opening. Just fold the fabric in, iron a good crease and iron a piece of fusion tape between them. By this point I was so over the piping and corner situation, that I decided to skip it on this one side. I rationalized that it would always be the end facing down, and therefore the piping would go unnoticed.

Wow, I’m putting a negative spin on these. It really was very basic, and I have 5 new throw pillows as a result!

Look closely and you’ll see that the really pointy corners are where the piping ends poke out, and the slightly puckered corners are where I criss-crossed the piping.
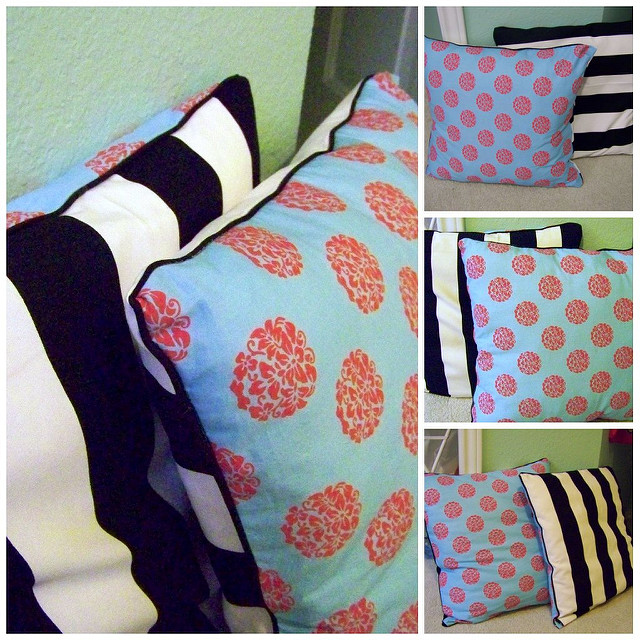
In the end, the piping wasn’t necessary, but sure does look cute!

Fabrics:
Black and white stripe — Ikea
Polka dots — Michael Miller Woodland Delight Pebble Stone Coral
Blue & Pink — Michael Miller Woodland Delight Blooms
Black Greek Key — Mill Creek Indoor/Outdoor Oskar Terrace Flint
I found them all at local stores, but with the exception of the Ikea fabric, you can find them on Fabric.com.
My blonde brain is taxed…so I’ll show you the snazzy pillows in their new homes in the next post! What do you think so far? Do you have No-Sew tips to add…or ideas for the corners?! Please share!
Update: see the throw pillows at work here, and the completed room here! And view a whole slew of easy and affordable projects in my Project Gallery.