Hello, Loves! Hope you had a grand weekend. We stayed close the fire, and worked on some fun Valentine crafts. I’ll be sure to share them with you soon (can you believe we’re already gearing up for another holiday?!?)
Last week I showed you the inspiration behind Babygirl’s New Room, with these two pics being the main sources.
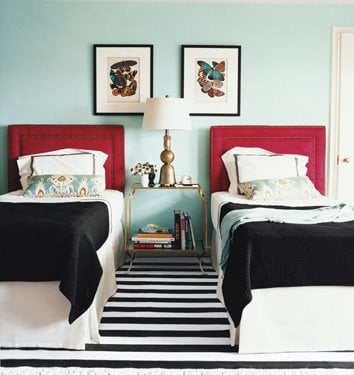
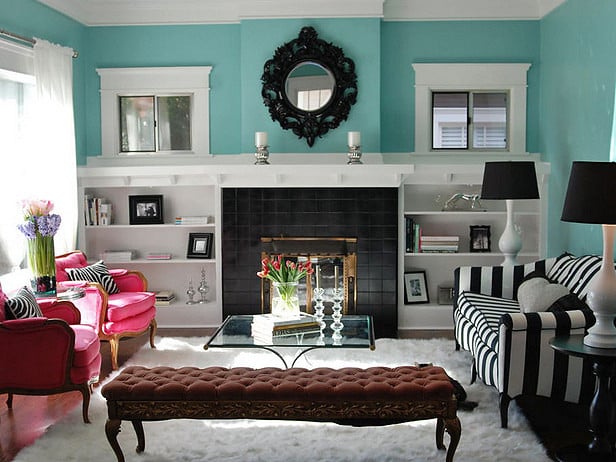
(domino)
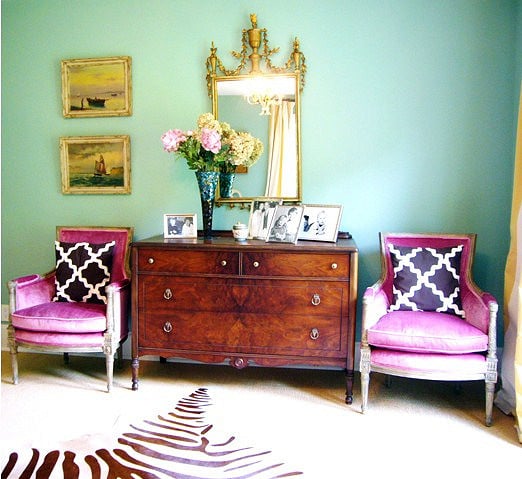
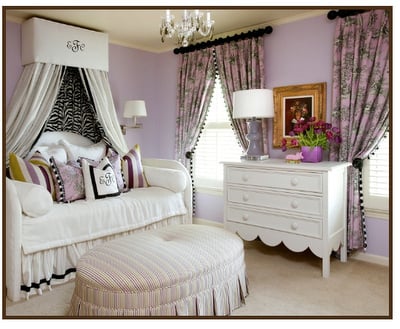
(marmalade interiors)
Besides the amazing color palette of aqua, radish and yellow…I was drawn to the black frames, nailhead trim and metallic accents. One thing I love about using black frames is they help to cut some of the sweetness in a room. And a blue and pink room could easily be too sweet….even though I’m creating the room for a little girl, I still want it to have a touch of sophistication and glamour.
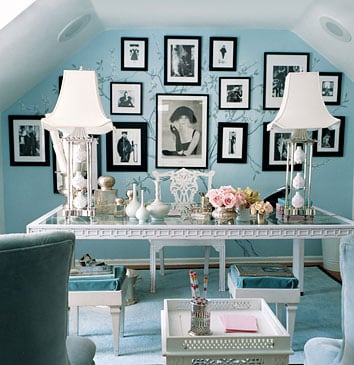
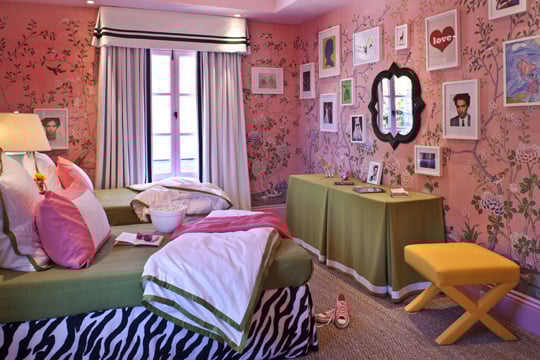
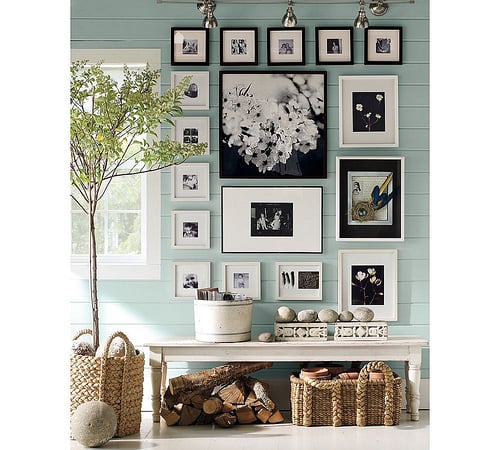
Here’s a few pictures to illustrate the power of a black frame or accent:
(inspired design)
(elle decor — can you guess why I really posted this pic?)
(decor pad)
(elements of style)
(the inspired room)
What do you suppose this room would look like without the dark frames and metallic headboard? I know it’s stunningly glamorous with them!
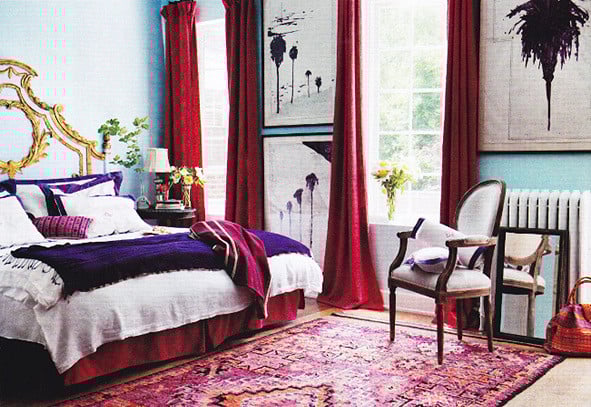
(julian schnabel)
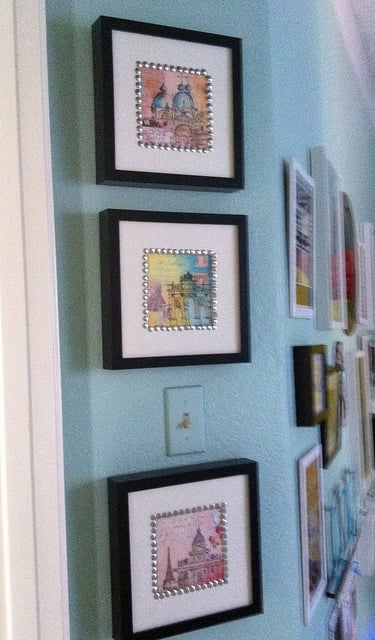
My goal was to find an inexpensive way to combine black frames, metallic shine and nailhead trim. Ikea black frames are my go-to, and since her bed (a gem I found for a steal on Craigslist!) isn’t upholstered, I needed another place to use nailhead trim. Or in my case, thumb tacks pretending to be trim! (I’m too cheap to use real nailhead trim in my kid’s rooms, like this burlap board I made my son.)
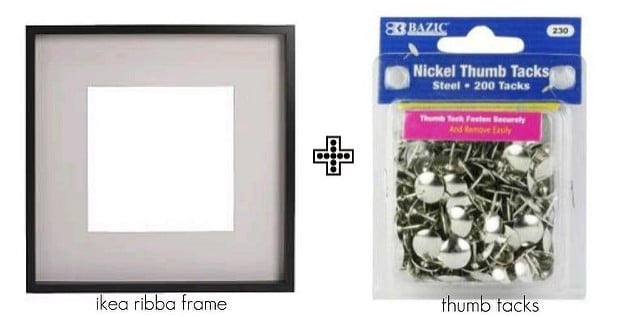
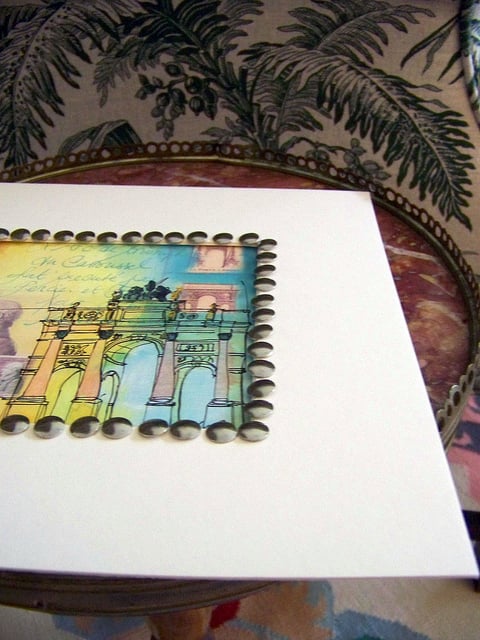
The silver thumb tacks give the impression of nailhead trim, and provide a bit of metallic flash too…Win/Win! I simply taped the picture in place on the back of the matte, then pushed the thumb tacks directly through the front of the matte and picture, creating a border of trim around the inside of the frame.
The Ribba frames work great for this project because there is plenty of room between the glass, and the back of the frame for the stem of the tacks to poke through.
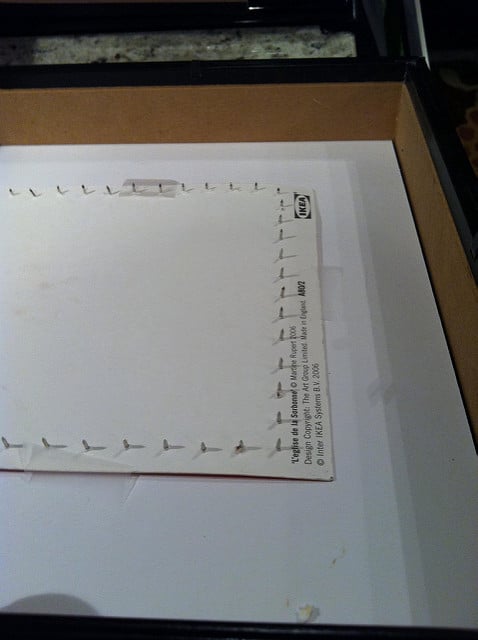
Slip the whole thing behind the glass and voila!

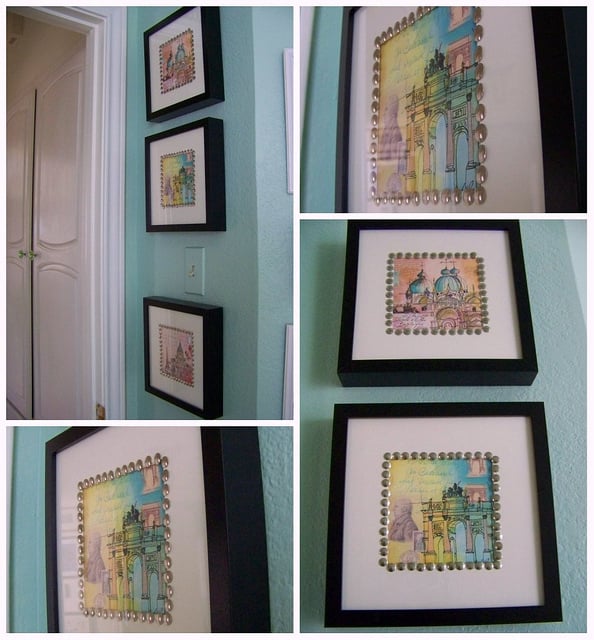
Have you guessed her room will have a Parisian flair? I actually found these prints in the stationary section at Ikea ages ago. It is sheer luck they contain the exact colors of her room….I love when you get that spark of excitement when a project starts to come together!
I’m a big fan of painting switch plates, vents and intakes the same color as the wall to make them disappear. Here’s a peek at the gallery wall I’m working on:
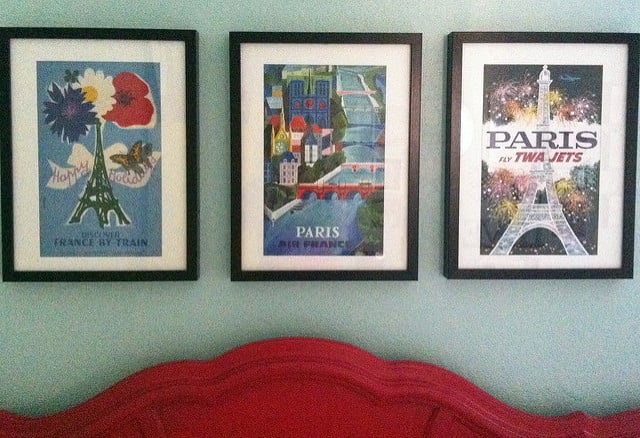
Remember the gorgeous Parisian calendar prints I framed for the other art in her room? They have similar frames as the Nailhead Pictures, adding to a sense of cohesiveness.
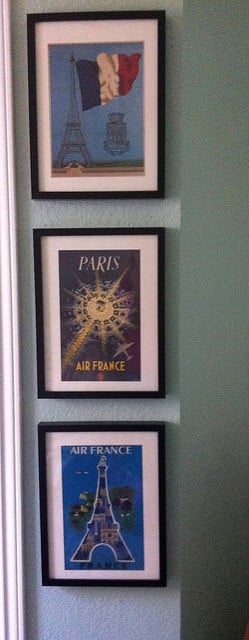
The colors are blending perfectly with the rest of the room, and the black frames are just the thing to keep it from looking sickly sweet.
So what do you think? Do you love black frames in a colorful room as much as I do? Oh, and a little tip if you decide to take on a Feux Nailhead-Trim project…make sure you have enough before you start. And I’ve found Home Depot to be the best resource for large boxes of thumb tacks in multiple colors.
looks great, and i love the prints inside them! what a neat idea!!
Looks great. I have just done a picture wall in our study. And yes, I too would have posted the Edward pic in the room. Sigh…..Edward.
Very cute! I would have never thought of this. I love how it's all coming together. Oh by the way, my blog is done! Thank you so much! It's because of you that I found House09. I loved the look of your blog and that made my decision very easy. So thank you!
I am loving the nailhead trim! It really makes the prints look so much more expensive.
Those are adorable! I love the faux nailhead trim. And, I adore black frames…have them everywhere!!
Brilliant idea, Cassie. Looks awesome.
Excellent Idea!
Mr. Goodwill Hunting
Great idea! I have been wanting to a nailhead bulletin board for my kitchen, you have just inspired to complete this project! Love the color scheme!
Oh, it's all starting to come together and I'm loving what I'm seeing! 🙂
What a fun tip with the thumb tacks…so clever!
i sure do, my daughters room has lots of black frames!
You are the master of DIY's. I love this idea!! Must try it somewhere in my house–it looks fantastic!
those look great – I love the look and I love sneak peaks of her room!
I love black frames in a room, yours look just great!
Those thumb tack frames look great! Such a good idea!
oh what a tease! It's looking so good. I love the black touches and the nailhead art rocks! Does this mean you might be sneaking a pic of Edward into your baby girl's room too? Perhaps the gallery wall?
Love Love Love! I want to see more!
I seriously would have never thought of doing that, but I loooove it! You are really creative- can't wait to see what you whipped up over the weekend!
Stunning! I love your creativity! You are brilliant!
Stumbled onto your blog…and so glad I did! I love the look of the black frames! It definitely keeps the room from being too girly and sweet! I like that you painted the light switches, too! I started looking around at mine and thinking "maybe I should paint mine to match!" Project, here I come! : )
definitely gives it a real custom look! great job!
It looks great! Can't wait to see the finished room!
I love black frames – I find they really finish off a room. The thumbtack idea is brilliant! 🙂
Such a great idea!!
I love this, Cas. I am a little obsessed with nailheads right now so I see a project coming my way! I love the little sneak peaks of her room!
Its looking good–I can't wait to see the big reveal.
The nailhead trim via thumb tacks is amazing. Love those black frames against the wall color!
Freakin' great idea Cassie! You never cease to amaze. I'm still LMAO over that picture because I'm guessing it got posted because of a certain young man on the wall??? Tell me if I'm right…(c:
http://loveallthingsbrightandbeautiful.blogspot.com
Really great idea! These came out great!
Do you know i had never really thought of black frames before as we always go for white but you are soooo right (as usual!!) they look so stylish against the colour. I think i'm going to have to try this!
Happy Monday lovely!
Rachie xo
You're a genius! Love the idea. And my guess is that you posted the elle decor pic because of the drapes. But there are a lot of other awesome elements in that room too.
Cute nailhead project! We were not as productive as you over the weekend 🙂
Fantastic…such a great idea and they look amazing!
Awesome! I love the art and your nailhead trim is a perfect accent. 🙂
Have a great week!
Roeshel
Looks fabulous! You are one smart cookie.
PS. do i spy an RPats picture??
So great! I love how it adds a little something extra to the pictures!
such a great idea!
Very clever!
That's great! If you have not been by yet, make sure you enter my linky contest! The best of January 2011 will be showered with prizes! I also have some great Valentines giveaways going on right now!
http://www.thesaturdaymorningsblog.com/2011/01/strut-your-stuff-link-up-party.html
This is such a genius idea!
And that first inspiration image is in my design file- I love it more every time I see it!
Anyway, I wanted to let you know that I am highlighting you tomorrow on Polly Want a Crafter! @ 4:00 pm CST
Hope you get some new readers!
I love every last one of these rooms! Some are in my all time favorite folder! Great DIY too!
Great finishing touch Cassie! What would we do without the IKEA Ribba frame?:) It totally dresses it up.
That is awesome! I love it. Just so you know, I will definitely be stealing this idea!
Navigated here from Polly wanta crafter—- very nice way to add a touch of style to your prints and I really like the pinboards too. Creative way to use thumbtacks. Great job! -Diane
I have used those same Ikea frames for projects. They are great. I love what you did with them.
great idea and im your newest follower
Love it! My neighbor and I are working on some ideas for her daughters room and we want to do a nailhead headboard (I am going to spray paint the nailheads hot pink) this would be a great addition to the room! Love your blog – come check mine out – just started.
http://hotmessmoma.blogspot.com/
Admiring the dedication you put into your blog and detailed information you offer.
It’s awesome to coome across a blog ever once in a while that isn’t
the same unwanted rehashed information. Great read! I’ve saved your ite and
I’m including your RSS feeds to my Google account.