I showed you my vamped up entrance hall yesterday:
It’s reeeeaalllly hard to get a good picture of a mirror!?! So apologies for the crap-ball pictures to follow.
I knew I wanted a large mirror for that wall….to open up the space and make the small area feel larger. But I didn’t want to spend a fortune on one, nor did I want to rip up the wall trying to hang a heavy mirror big enough to fill it. *that’s what she said* (Seriously, it’s like turrets!) I also like to create original things when possible. Here was my inspiration:
House Beautiful
The answer was Ikea.
LOTS tiles — pack of 4 for $10 (website says $5, but they were $10 in my store.) They are each a square foot.
First I blocked off the wall with painters tape in 12″ increments until I was happy with the size.
My mirror is 3′ x 5′, so I needed 15 mirror tiles. They come with self-adhesive tabs you apply to each corner:
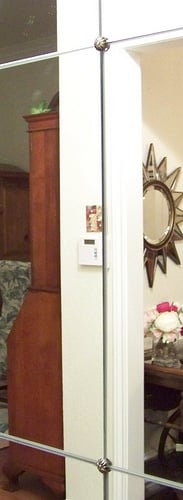
I used a level to mark my top and side placement right (really, nothing would drive me battier than a wonk-eyed mirror!), and started in the top left corner. And I don’t know what Ikea puts on those adhesive tabs, but Moses could not pry them off the wall within a second after placement! You could seriously plug the holes in the Titanic with these things. This is what it looked like when I got all of them up:
Again, hard to take a pic of a mirror. But without a frame, the edges were undefined and it looked like I tacked mirrors on the wall. (Well, I did, but didn’t want it to look like that!) I decided to trim it with a 1/2″ thick twisted rope (this project required 5 1/2 yards, I found it in the Trim section at JoAnns Fabric).
Using Fabri–Tac glue, I started in the bottom right corner and applied a thin layer of glue to the edge of the mirror. I put a piece of painters tape every foot or so, just to reinforce the rope until the glue dried.
The trim helped to anchor the mirror and give it more definition on the wall. Next was creating the little bit of ‘pizz-azz’ by placing decorative nails (in the nailhead trim section) at the intersecting seams. If I’d followed the directions on the Ikea mirror, I would have left a sliver of space between each tile, thus giving me room to push in the nail. Since my tiles are pressed so tightly together, Mr. Sugarplum cut the stick part off the back of each nail, and I just glued them directly on the mirror.
It adds a nice finishing touch. I couldn’t get a good close up of the nail, but it’s distressed brass.
So there it is…easy breezy! I have a fear of my DIYs coming out like a 7th grade craft project….so what do you think?
UPDATE: The mirror got another upgrade…check it out here.
are you kidding me?!?!?! you are seriously freaking me out with all your DIY projects!!!! I would never even attempt something like that….. I need to go to your "Cassie Wife/Mom/ridiculousy CRAFTY SCHOOL".
Your entry/foyer caught my eye over at Emily's blog and now I am hooked on your blog! What an excellent idea for a mirror (mind if I steal it?) Now following and can't wait to have a good look around your blog:o) Angex
I think it is going to be some bring old article, but it really compensated for ours time. I will posted a links to this post on my blog. I am sure ours visitor will think that very useful
I'm so glad you linked to this in today's post. My sister has these same mirrors and I was trying to remember where I had seen this DIY. I am going to be doing this for her, for sure. One question, where did you buy the decorative nailheads? I'm also thinking of framing out the mirrors with wood and adding the nailheads. I'm excited about trying it.
Yesterday, I saw a similar mirror at Lowes, thought–I want that for above my fire place but it's two small. So I thought I am going to make one of my own. Read your comment at Honey We're home regarding cereal and thought this is my kind of girl.
Of course I had to check out your blog– so excited to see your mirror project!! 🙂
I bought these and tried the exact same thing but my mirror is out of sync (wonky)
What have I done wrong?
I placed the tiles on top of each other to fit..
Hi Samantha…it’s possible your wall isn’t even. Perhaps trying something to level it out (similar to how you’d put a sugar packet under a wobbly restaurant table leg) 🙂 Hope this helps and good luck with your project!


Very nice touch! I love it!
I love the way the nailheads look and the doors are awesome !
are you kidding me?!?!?! you are seriously freaking me out with all your DIY projects!!!! I would never even attempt something like that….. I need to go to your "Cassie Wife/Mom/ridiculousy CRAFTY SCHOOL".
Your entry/foyer caught my eye over at Emily's blog and now I am hooked on your blog! What an excellent idea for a mirror (mind if I steal it?)
Now following and can't wait to have a good look around your blog:o)
Angex
Awesome!
I think it is going to be some bring old article, but it really compensated for ours time. I will posted a links to this post on my blog. I am sure ours visitor will think that very useful
I am about to tackle this for our master. I have my mirrors and frame . . just need the time! 🙂
I know this is an old post, but I just ran across your blog and I must say,the mirror is amazing.
I saw this in a magazine but in a wood frame and it was like 17th century french and I saved it in my pics to do someday too!
I'm so glad you linked to this in today's post. My sister has these same mirrors and I was trying to remember where I had seen this DIY. I am going to be doing this for her, for sure. One question, where did you buy the decorative nailheads? I'm also thinking of framing out the mirrors with wood and adding the nailheads. I'm excited about trying it.
Yesterday, I saw a similar mirror at Lowes, thought–I want that for above my fire place but it's two small. So I thought I am going to make one of my own. Read your comment at Honey We're home regarding cereal and thought this is my kind of girl.
Of course I had to check out your blog– so excited to see your mirror project!! 🙂
wow very nice and explained to eloquently as to not be intimidating. you are a brilliant individual!
I bought these and tried the exact same thing but my mirror is out of sync (wonky)
What have I done wrong?
I placed the tiles on top of each other to fit..
Hi Samantha…it’s possible your wall isn’t even. Perhaps trying something to level it out (similar to how you’d put a sugar packet under a wobbly restaurant table leg) 🙂 Hope this helps and good luck with your project!
Where have you been all my life? I’ve been looking all over the net for a DIY on this.
THANK YOU,
S.